Reader Louis would like to burn his camcorders content to DVD in full HD 1080p. He writes:
I have a Sony AVCHD camcorder that I dont always keep at home. I was wondering if there was a way for me to burn it in Full HD (1920 X 1080) so that I can play the results on a DVD player?
There is. And walk through below detailed guide.
AVCHD is a high-definition video format, widely used on higher-end consumer digital camcorders. When youd like to
convert AVCHD(MTS.M2TS) videos to DVD and watch it on your HD television (HD TV) or on your computer, you may need a DVD burner to burn AVCHD to DVD.
As we know, iDVD only supports common videos like MOV, MPEG-4, H.264, MPEG, M4V, 3GP. For HD video, such as AVCHD, MTS, M2TS, TS, TP, TRP, iDVD couldnt handle well. To do this job, we at iFunia naturally recommend
DVD Creator for Mac (Mountain Lion supported). With this DVD maker, you can easily burn all popular videos to DVD with excellent quality. Whats more, the embedded editing functions and free menu templates can help to touch up your video DVD instantly.
Free Download DVD Creator for Mac and install it. To install it, simply mount the .dmg archive by double-clicking it, and copy the application to your applications folder (or wherever you want).
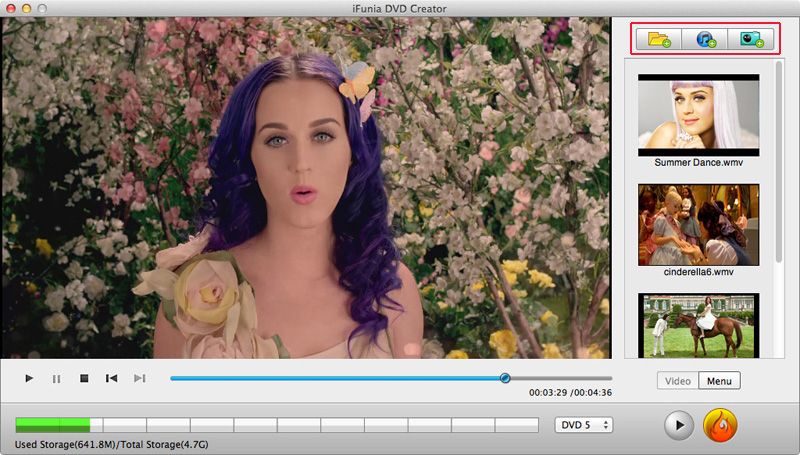
Step 1. Import AVCHD Video ClipsDownload and run iFunia DVD Creator for Mac, load your AVCHD videos into the program by drag&drop. When complete, preview the videos in the left Previewing window. On the right source window, you are free to organize the videos order. AVCHD records video at a range of resolutions including 1080p, 1080i and 720p. When burning AVCHD to DVD, select High Quality in the burning parameters to ensure the video quality.
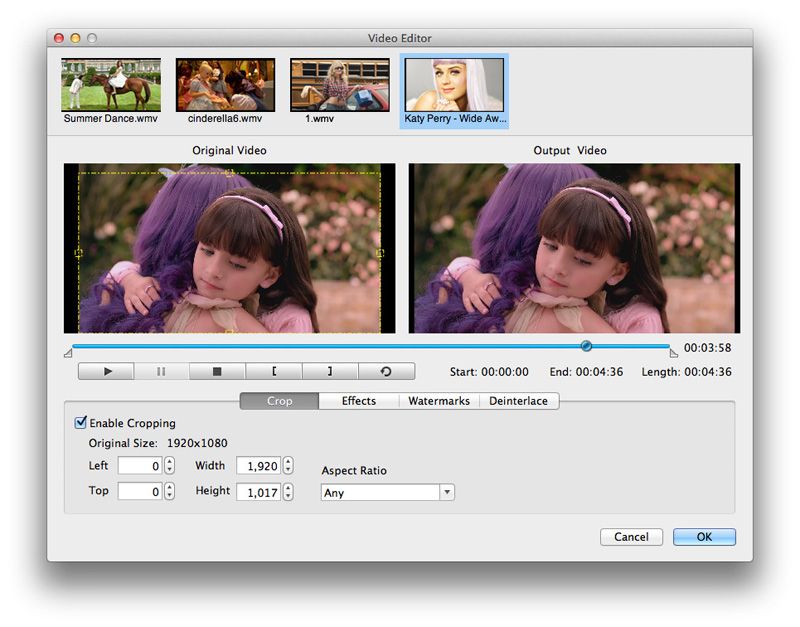
 Step 2. Trim, Crop and De-interlace Your AVCHD MTS/M2TS files.
Editing functions are available in
iFunia DVD Creator for Mac. Double click the video youd like to edit and decorate your videos by crop, trim, de-interlace and adjust the effect of the videos. You can add watermarks to illustrate the scenes or give the video a background music you like.
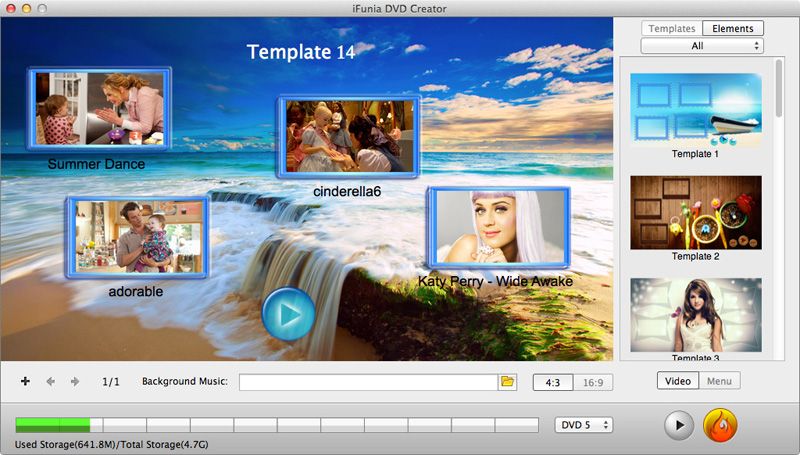
 Step 3. Select a DVD Menu
Click the Menu button on the lower right bottom of the main interface to enter the menu editing window. Rich variety of stylish free DVD menu templates are provided. Choose a suitable menu style for your DVD, and then customize it according to your needs. In the Menu page, you can freely add text and change the frame and button of the menu. You can also Click background music to add music from local files.
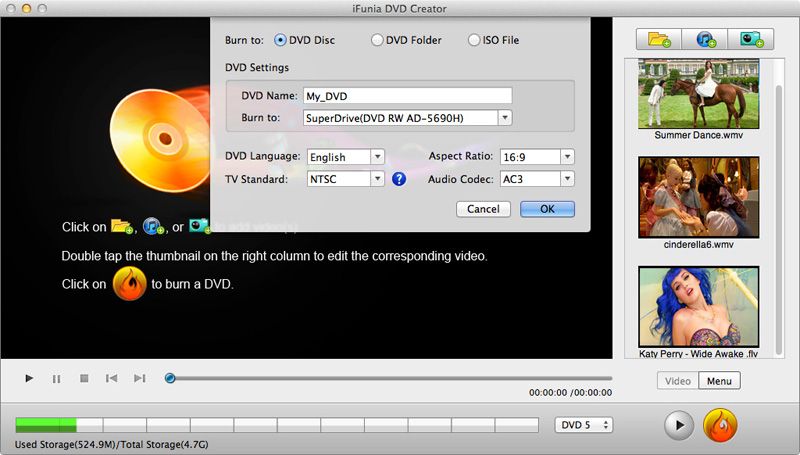
 Step 4. Start AVCHD Burning
Now you can preview your entire DVD movie project to ensure everything is perfect. After all necessary settings, you need to insert a blank or re-writable disc to your Mac if you want to burn video files on DVD disc. Or you can simply convert the videos to DVD folder or ISO file on your Mac for later burning.
That is it! With just a few clicks, you can create DVD from AVCHD files with gorgeous DVD menus and eye-catching video effects. Just enjoy the AVCHD videos and movies on your big TV screen! Watch the step-by-step video tutorial below:
http://www.youtube.com/watch?feature=playe...p;v=MledA_u9BIA


 Answer Line: How To Burn Avchd Footage To Dvd In Full Hd (1920 X 1080)?
 Wed 17 Apr 2013, 10:24

