Everyone loves receiving Christmas gifts.
Christmas home made DVDs help us keep family and friends close to our heart during the holidays.
This year why not make your own Christmas DVDs for an extra-special touch? Even just adding little Christmas party details family get together videos, Christmas carols sung by family member will go a long way. In this article, well show you how to make a Christmas DVD that will be cherished by all who receive them.
Best Christmas Video to DVD BurneriFunia DVD Creator for Mac is the best answer to make a Christmas DVD on Mac. Apart from its up to 15x video converting speed and simple editing functions, it is also a professional DVD burning and creating solution which comes with various DVD templates. In the following guide, we will detail you how to make a Christmas DVD with iFunia DVD Creator for Mac.
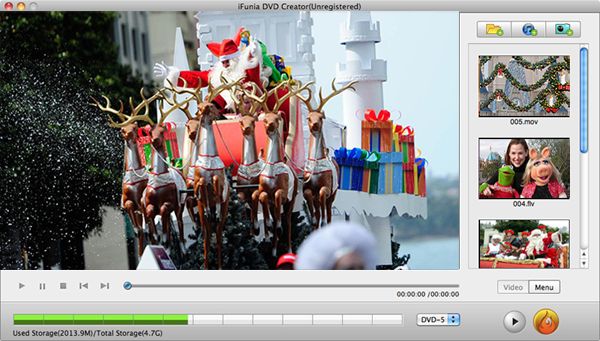
Free Download DVD Creator for Mac and install itHow to Burn Christmas Home Video to DVD Step By StepStep 1. Transfer Christmas videos to computerDownload and install DVD Creator for Mac, after that you can load your Christmas home video files into the program by drag&drop. The loaded files will be shown in thumbnail at the file list. You can rearrange them by dragging and dropping the thumbnail freely according to your preference.
 Note
Note: This Mac DVD Creator supports almost all types of video, be it downloaded from the Internet, recorded from camcorders, or created by iPod Touch and iPhone 5.
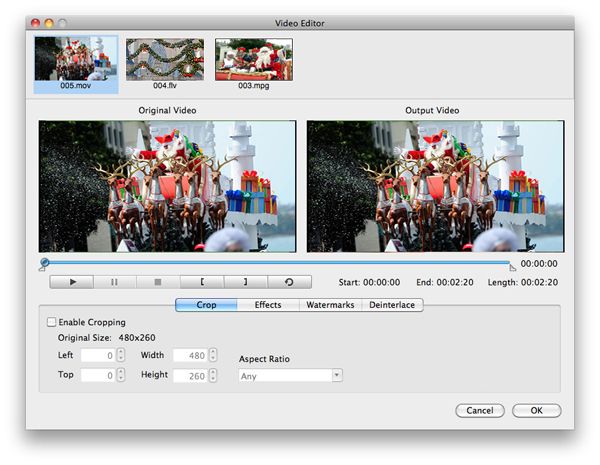
Step 2. Edit the Christmas home videosOn the right panel of DVD Creator for Mac, double click a video you need to open the video editing window. You can crop, rotate, trim videos, etc. as you like and add watermarks and set some special video effects to make them look greater!
 Step 3. Select a Christmas DVD menu
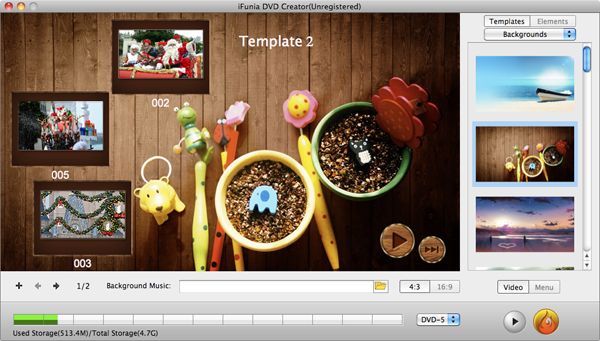
Click the Menu button on the lower right bottom of the main interface to enter the menu editing window. There are many free Christmas DVD menu template for your choices. Just find the one you like. You can also customize the DVD menu frames, buttons, and title names, etc. with your favorite ones to make the DVD menu more personalized. You can even choose a song to accompany the displayed menu.
 Step 4. Preview and burn Christmas home videos to DVD
Before burning, youd better preview your DVD project. Click the play button in the tool bar, and a standalone preview window will open. There you can have a look at your entire DVD movie in real-time. Turn back to make changes whenever you want.
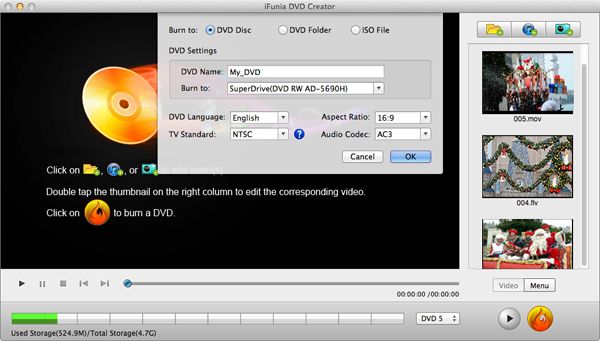
When settings are complete, click the Burn button at bottom to continue. DVD Creator has 3 output options: DVD Disc, ISO file and DVD Folder. Make settings (e.g. Output destination and TV standard) in the resulting dialog and click OK to start burning your Christmas video files to DVD. After a while, youll get prompted when DVD burning is complete.


 Mon 17 Dec 2012, 07:52

